As of September 18, 2024, U.S. suppliers are automatically redirected from Item 360 to Supplier One for item and inventory workflows. Suppliers who also sell in Canada and category advisors will continue using Item 360.
If you use Workhorse to upload Fashion imagery, please continue to use your existing processes.
You can edit existing imagery and upload new imagery directly from the Catalog in Item 360. Here's how:
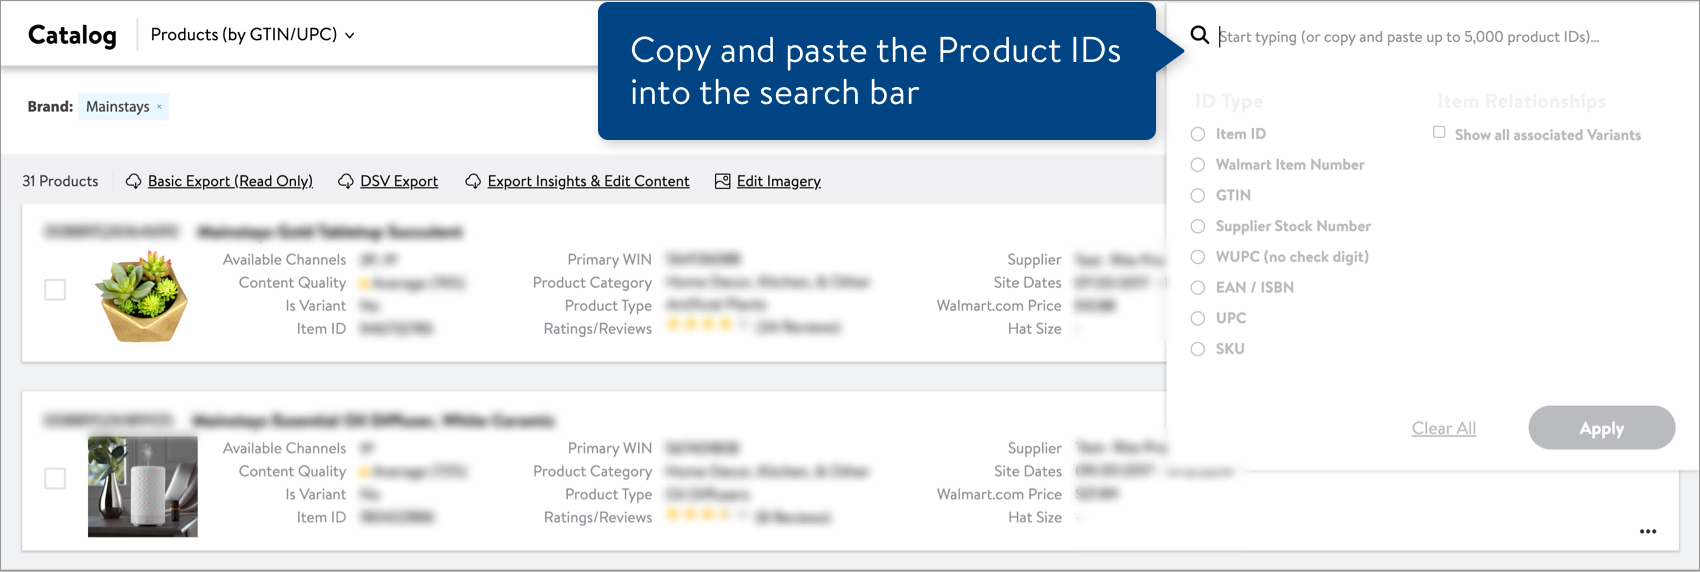
In the Products or Item Configurations view of your Catalog, click the Product ID Search bar next to the filter icon.We recommend that you manage imagery for a maximum of 50 items at a time. Copy and paste the Product IDs in the search bar. Remember to select the ID Type if you’re searching for multiple items (all of your Product IDs must be the same type). You do not need to select an ID Type if you’re searching for only one item. Then, click the Apply button.
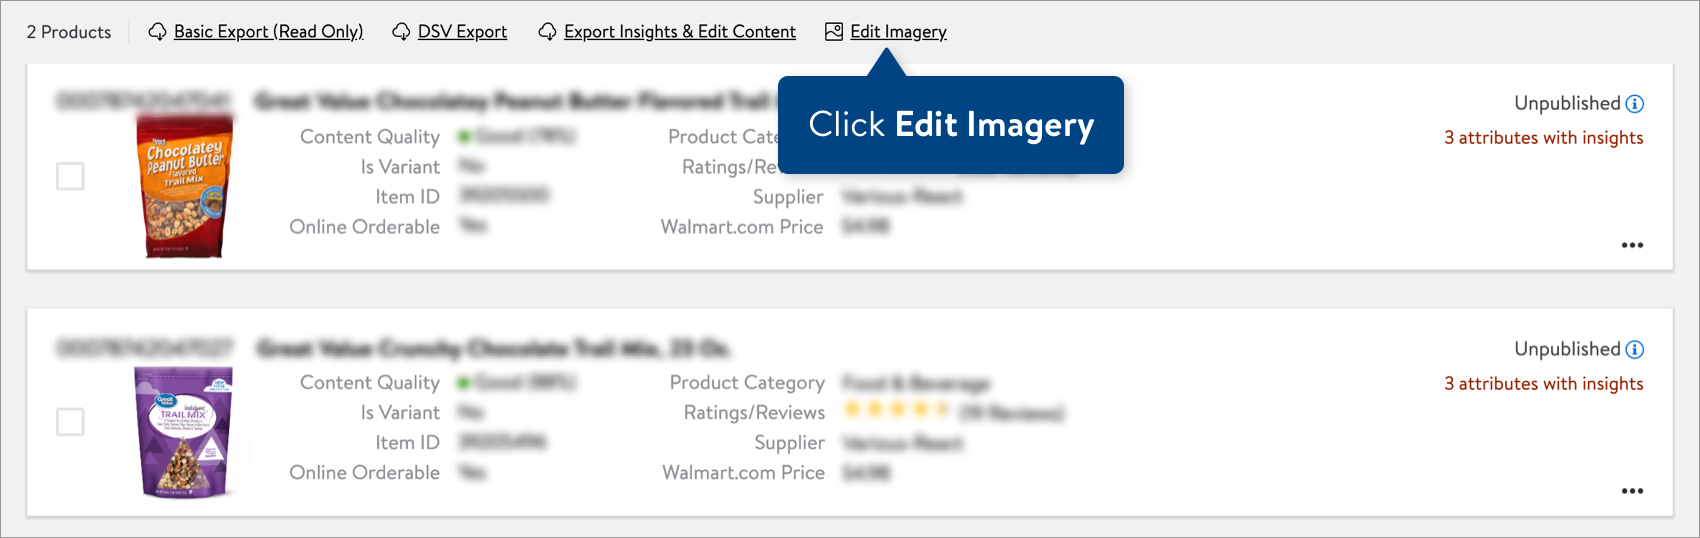
Once you have less than 50 items or have selected individual items by clicking the check box on the cards, click Edit Imagery.
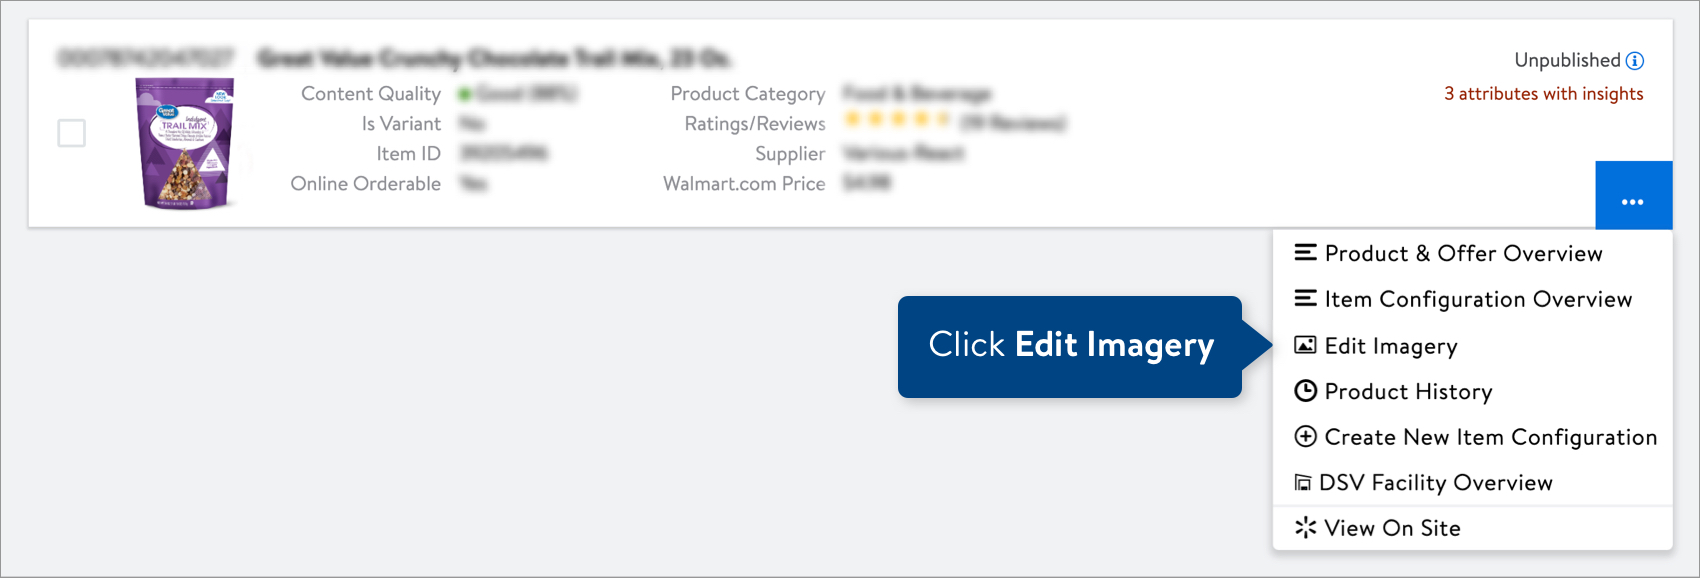
To manage images for a single item, click the three dots at the bottom right corner of the item card. Then, click Edit Imagery.
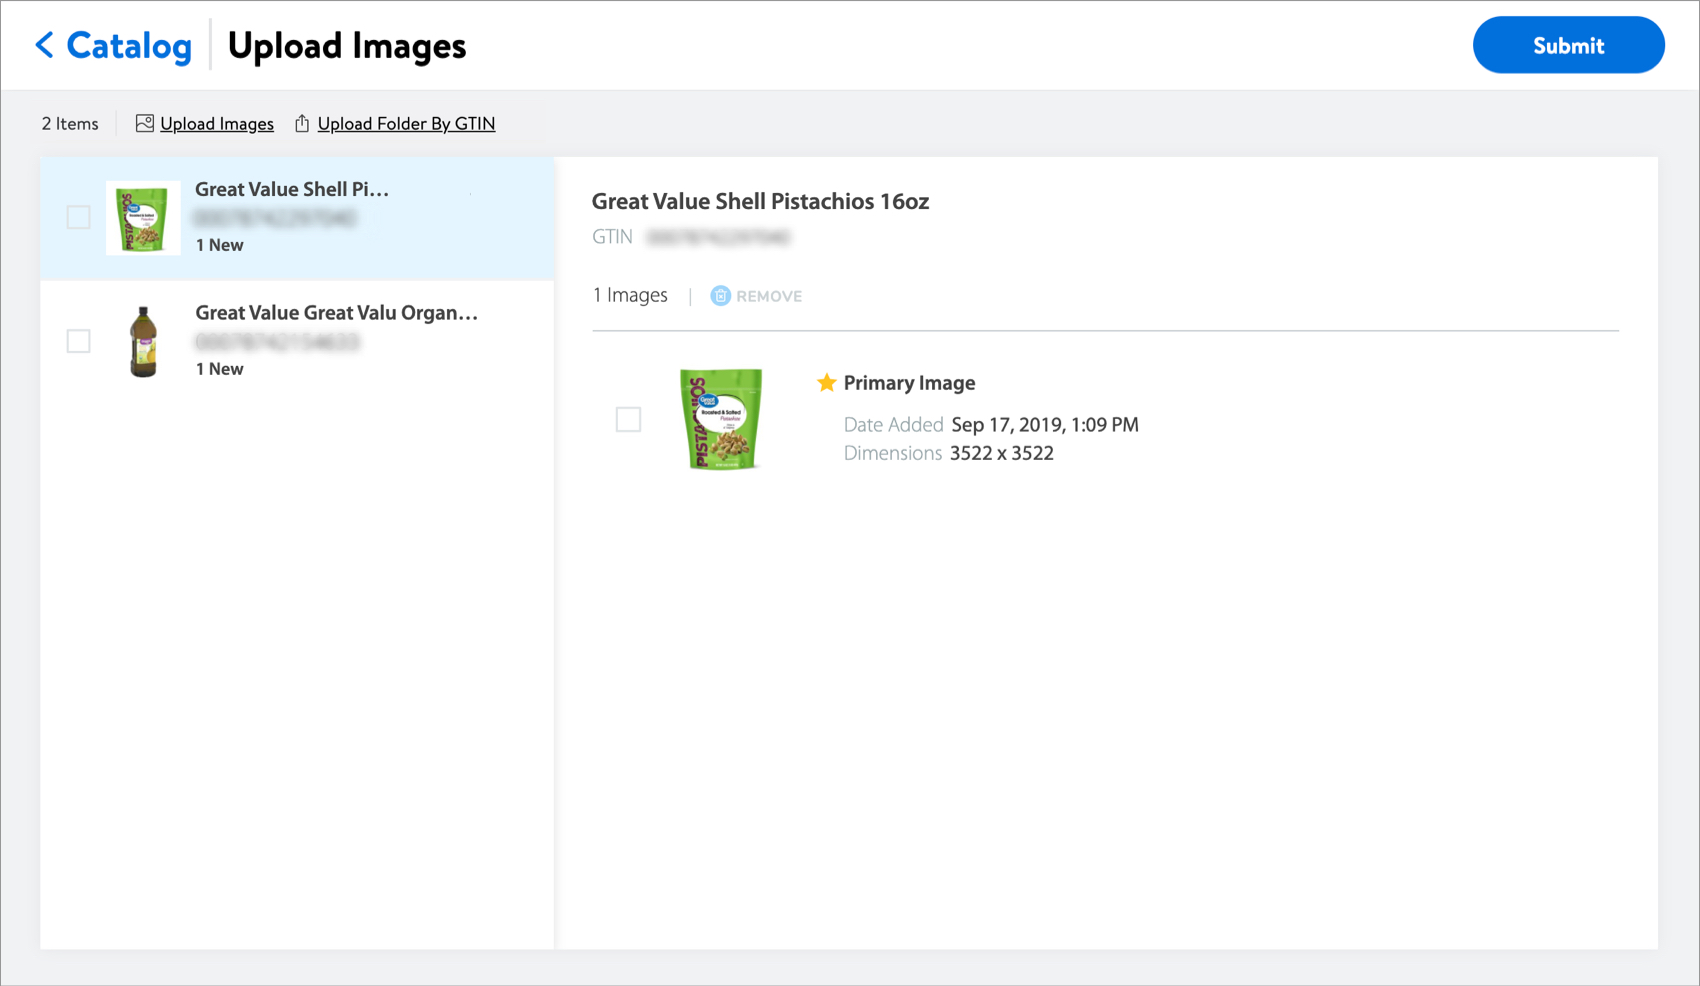
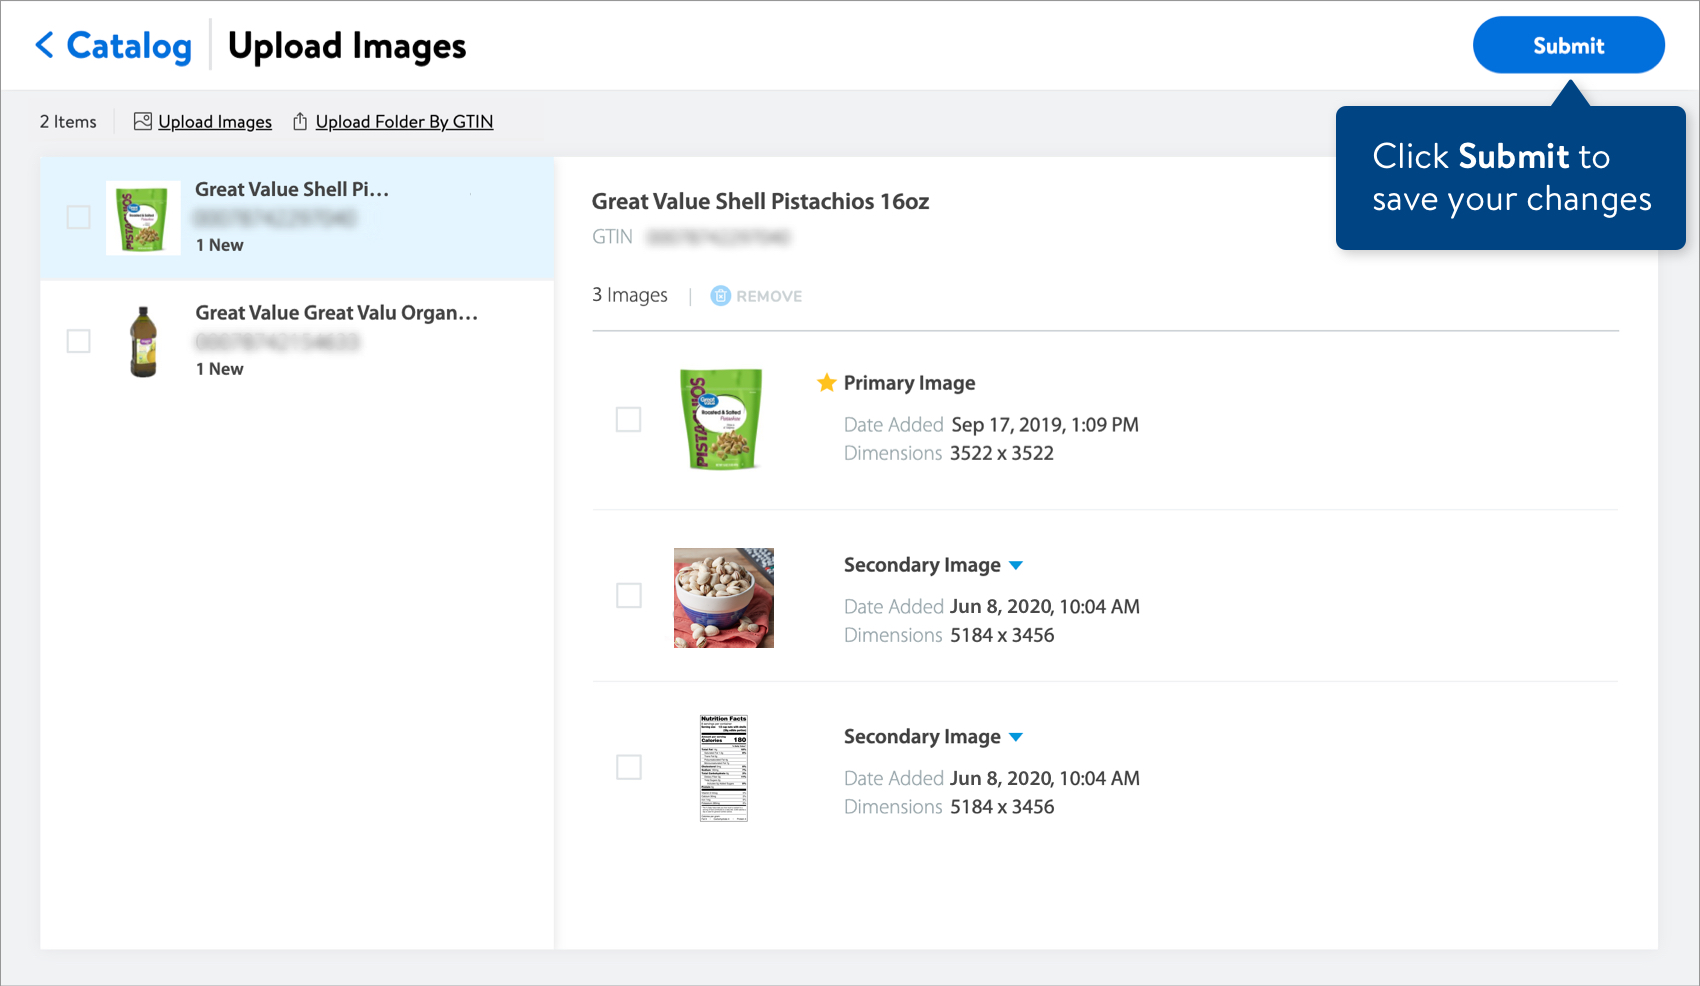
We'll create a folder of images for each item on the left side of your screen. Any existing images are shown on the right side. You can do many things on this page:

 To manage images for a single item, click the three dots at the bottom right corner of the item card. Then, click Edit Imagery.